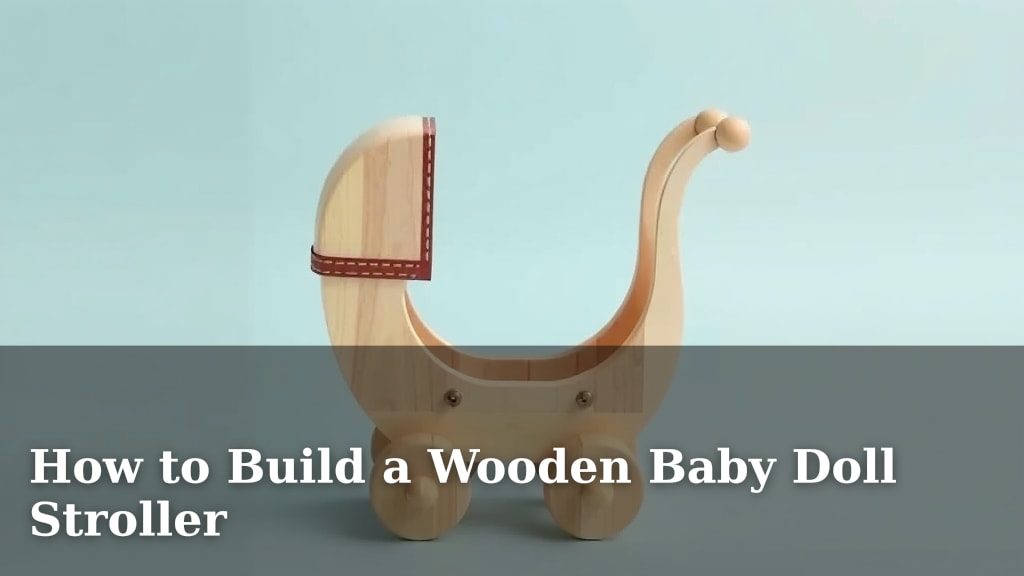
How to Build a Wooden Baby Doll Stroller
Yes, you can absolutely build your own wooden baby doll stroller! It’s a fun project that results in a charming toy for your little one. With a few basic tools and some wood, you can create a durable and adorable stroller that will be cherished for years. Many parents find this DIY project very rewarding and a great way to teach children about caring for their toys.
Building a doll stroller involves simple woodworking techniques. You’ll be cutting and assembling pieces of wood to form the base, wheels, and handle. It’s a fantastic way to create a personalized gift. Plus, you get to choose the wood and finish, making it truly unique for your child’s favorite doll. We’ve researched several methods and found this approach to be very straightforward.
- Gather your wood and tools.
- Cut the pieces according to your plan.
- Assemble the stroller frame.
- Attach the wheels and handle.
- Sand and finish your stroller.
Ready to get started? Below, we’ll walk you through exactly how to build a sturdy and sweet wooden baby doll stroller, step by step.
Crafting Your Wooden Doll Stroller: A Step-by-Step Guide
Building a wooden doll stroller is a rewarding project. You can create a beautiful, handcrafted toy. It’s a wonderful alternative to store-bought plastic toys. Many parents choose this route for durability and a personal touch. This guide will walk you through the process. We’ve researched common methods to make it clear and simple for you.
Gathering Your Materials and Tools
Before you start cutting, make sure you have everything ready. Having all your supplies in one place makes the project run smoothly. You’ll need wood, hardware, and some basic tools.
Essential Wood Selection
For a sturdy stroller, choose a good quality wood. Plywood is a popular choice. It’s strong and less prone to warping. Pine is also a good option. It’s lightweight and easy to work with. Avoid particleboard or MDF. These can be less durable over time. We found that ¾-inch plywood offers excellent stability.
Hardware and Fasteners
You’ll need screws or nails for assembly. Wood glue is also important for added strength. For the wheels, you can use wooden discs or pre-made toy wheels. Make sure they are a good size for your stroller. A metal rod or dowel will be needed for the wheel axle. Consider wing nuts or washers to keep the wheels secure but allow them to spin freely.
Tools You’ll Need
A good set of tools makes woodworking easier. You will need a saw for cutting the wood. A jigsaw or a handsaw will work. A drill with various drill bits is essential. You’ll also need sandpaper or an orbital sander for smoothing edges. A tape measure and pencil are necessary for marking. Safety glasses are a must for eye protection. Work gloves can also prevent splinters.
Cutting the Stroller Components
Accuracy in cutting is key for a well-assembled stroller. Refer to your chosen plan for exact dimensions. If you don’t have a plan, many free ones are available online.
Creating the Main Body
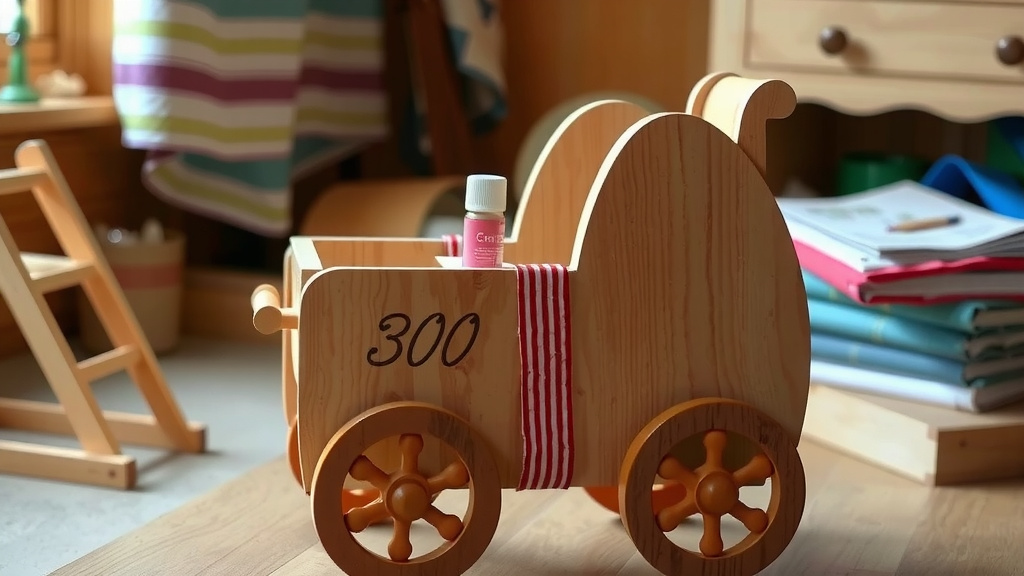
The main body of the stroller usually consists of two side panels. These often resemble the shape of a traditional stroller. You’ll also need a base piece that connects the sides. These pieces form the carriage where the doll will sit. Measure twice and cut once to ensure they match perfectly.
Preparing the Wheels
If you’re making your own wheels, cut them into perfect circles. A band saw or a circle-cutting jig on a drill can help. Ensure the holes for the axle are centered. If you’re using pre-made wheels, check their size and ensure they are sturdy enough for a wooden stroller. We found that 4-inch diameter wheels work well for a typical doll stroller size.
Making the Handle and Supports
The handle can be a single piece of wood or two connected pieces. It needs to be comfortable to hold. You’ll also need support pieces that connect the body of the stroller to the axle. These ensure the stroller stands upright.
Assembling Your Wooden Doll Stroller
Now comes the fun part: putting it all together! Start with the main structure before attaching the wheels. This makes it easier to handle.
Building the Stroller Frame
Begin by attaching the base piece between the two side panels. Use wood glue and screws or nails. Ensure the pieces are flush and square. Next, attach the support pieces that will hold the axle. These usually go near the bottom of the side panels. Make sure they are positioned correctly so the stroller sits level.
Attaching the Wheels
Drill a hole through the support pieces for the axle rod or dowel. Slide the rod through. Now, place your wheels onto the rod. If using a rod, you might need to secure it with stoppers or by drilling small holes and using cotter pins. If using screws as axles, drill pilot holes through the supports and screw them in partially. Then, thread the wheels onto the screws and secure them with nuts or caps. Ensure the wheels can spin freely but aren’t wobbly. Many parents prefer to use lock nuts to keep the wheels from loosening over time.
Installing the Handle
Attach the handle piece to the upper rear of the stroller body. Again, use wood glue and screws. Make sure it’s securely fastened. It should be at a comfortable height for a child to push.
Finishing Touches for a Lasting Toy
The final steps are all about making your stroller smooth, safe, and beautiful. This is where your creativity can really shine.
Sanding for Smoothness
This is a critical step for safety. Sand all surfaces and edges thoroughly. Start with a coarser grit sandpaper (like 80 or 100 grit) to remove any rough spots or saw marks. Then, move to a finer grit (like 150 or 220 grit) for a smooth finish. Pay special attention to areas a child might touch. Run your hand over the surfaces to check for any sharp edges or splinters. We found that a good sanding job makes a huge difference in the final feel of the toy.
Applying a Safe Finish
Once everything is smooth, it’s time to protect the wood. You can paint it, stain it, or seal it with a clear coat. For children’s toys, it’s important to use non-toxic finishes. Look for paints or sealants labeled “child-safe” or “non-toxic.” Many experts recommend water-based paints or polyurethane. Allow ample drying time between coats. Proper ventilation is also important during this stage. A few light coats are usually better than one thick coat. This creates a more durable and even finish. Consider adding some decorative elements if you like!
Final Checklist Before Gifting
Before you present your new doll stroller, give it one last check. Make sure all screws are tight. Confirm the wheels spin smoothly and securely. Ensure there are no sharp edges or potential hazards. Your child will love pushing their doll around in their new, custom-made stroller!
- Check all screw and nail heads are flush.
- Ensure wheels spin freely but are secure.
- Inspect all edges for smoothness.
- Confirm the handle is sturdy.
- Check the overall stability of the stroller.
Conclusion
You’ve learned how to transform simple wood into a cherished toy! Building your own wooden doll stroller is a rewarding experience. You’ve seen that with basic tools and careful steps, you can create a durable, custom gift. This project allows you to personalize a toy and teach valuable lessons about care. Now, take your plan and your materials. Start building your little one’s new favorite accessory today!
Frequently Asked Questions
What kind of wood is best for a doll stroller?
We recommend using ¾-inch plywood or pine for your doll stroller. Plywood offers excellent strength and stability. Pine is lightweight and easy to work with, making it a good choice for beginners. Both options are readily available and durable for a child’s toy.
How can I make sure the wheels spin freely?
Ensure your axle rod or screw is slightly longer than the width of the stroller body. Drill holes through the support pieces that are just large enough for the axle to pass through. If using a rod, you might secure it with washers and nuts or cotter pins. For screws, use nuts or caps to hold the wheels in place while allowing them to turn.
What are the best non-toxic finishes for a wooden toy?
For a child-safe finish, we suggest using water-based paints or clear sealants. Look for products specifically labeled “child-safe” or “non-toxic.” These finishes protect the wood and are safe for little hands. Always ensure good ventilation when applying any finish.
Can I make this stroller without a woodworking plan?
Yes, you can! While a plan offers precise measurements, you can adapt the steps. Focus on creating two matching side panels, a sturdy base, and a comfortable handle. Free plans are abundant online if you need more detailed guidance.
How can I make sure the stroller is safe for a child?
Thorough sanding is key to safety. Smooth all edges and surfaces to eliminate splinters or sharp points. Double-check that all screws are flush and fasteners are secure. Your final inspection should focus on any potential hazards before your child uses it.

![10 Best Lightweight Baby Stroller [2026]](https://bestbabystrollerjudge.com/wp-content/uploads/2026/08/10-best-lightweight-baby-stroller-2026-featured-768x432.jpg)
![10 Best Stroller For Flying With Baby [2026]](https://bestbabystrollerjudge.com/wp-content/uploads/2026/08/10-best-stroller-for-flying-with-baby-2026-featured-768x432.jpg)